# BitBucket OAuth Consumer
# 创建一个新的 OAuth Consumer
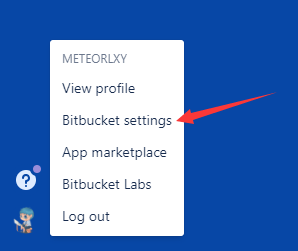
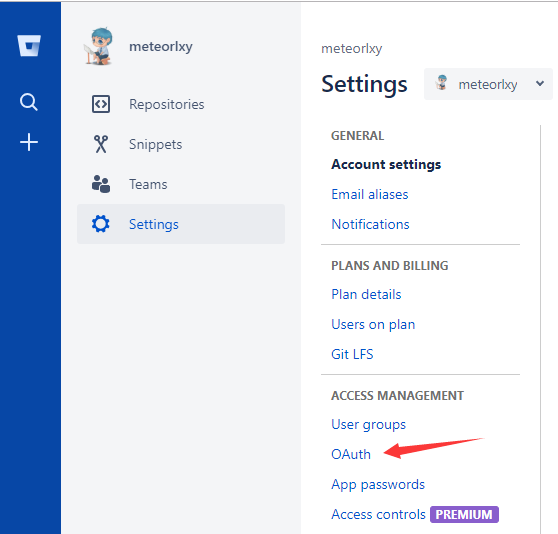
- 前往 Bitbucket settings - OAuth
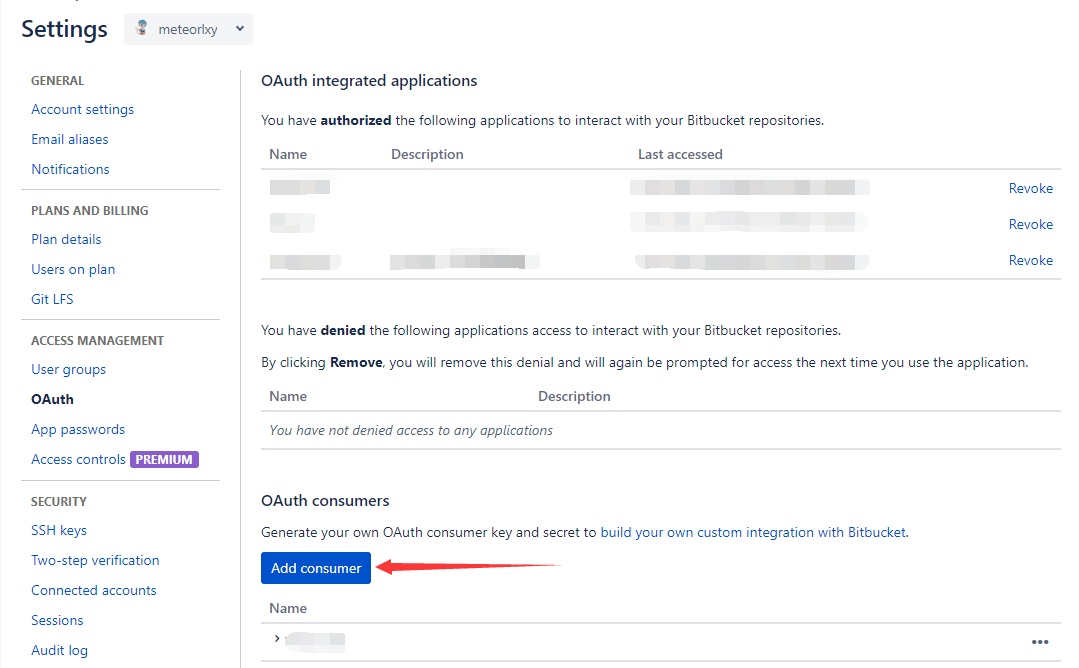
- 点击 Add consumer
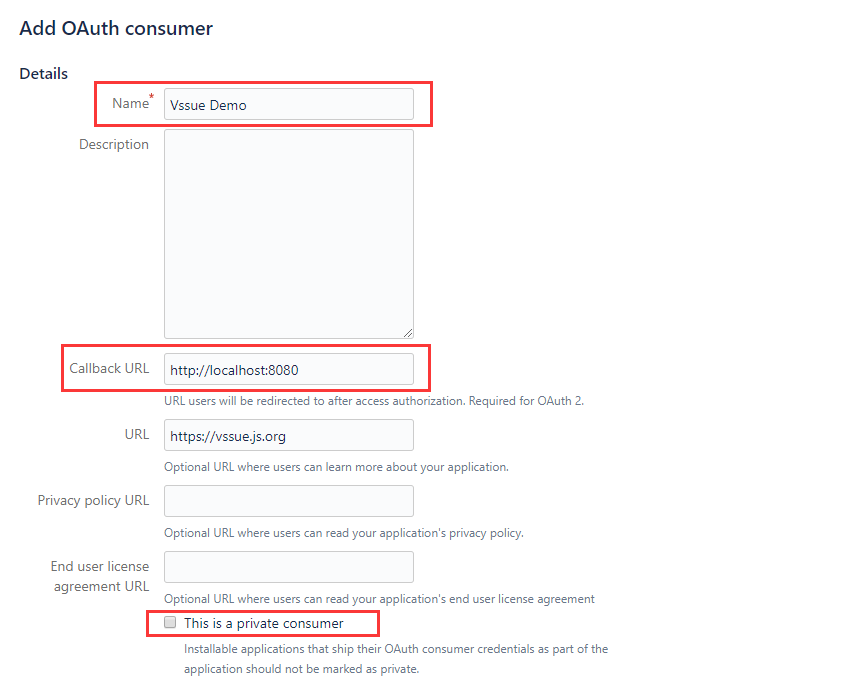
- 将
Callback URL设置为你的网站 URL(这里我们用localhost:8080作为示例) - 取消选择
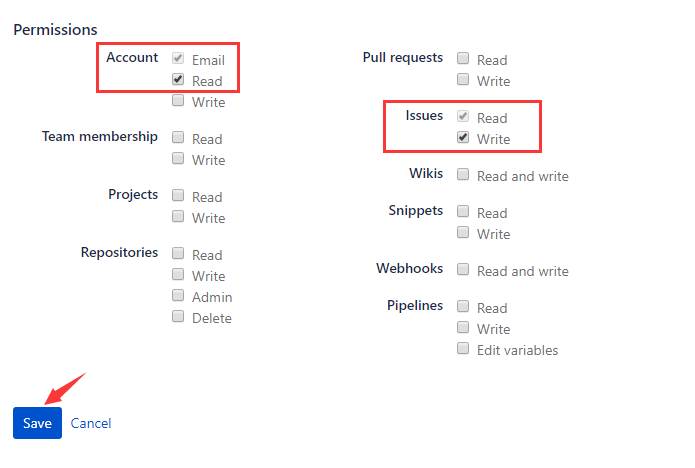
This is a private consumer - 勾选
Account - Read和Issues - Write权限
# 获取 Client ID
现在你已经创建了一个新的 OAuth Consumer,并得到了相应的 Key (Client ID).

# 配置并启动你的 Vssue
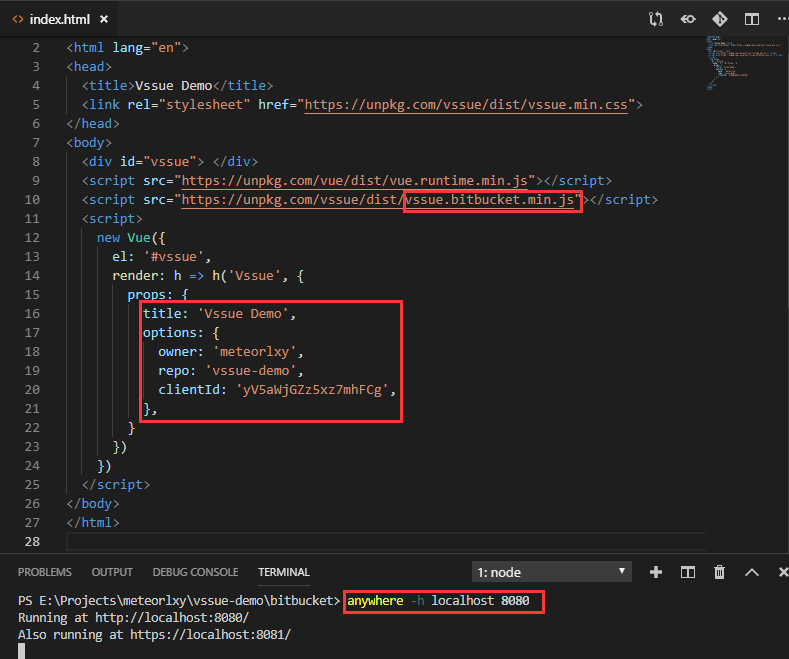
复制 Client ID,并设置 owner 和 repo。
Bitbucket repository 的 URL 模式为
https://bitbucket.org/${owner}/${repo}
这里我们以 https://bitbucket.org/meteorlxy/vssue-demo 为例,并把 issue 的 title 设置为 Vssue Demo。
然后运行 anywhere -h localhost 8080,在 localhost:8080 监听一个 http server 并返回 index.html。
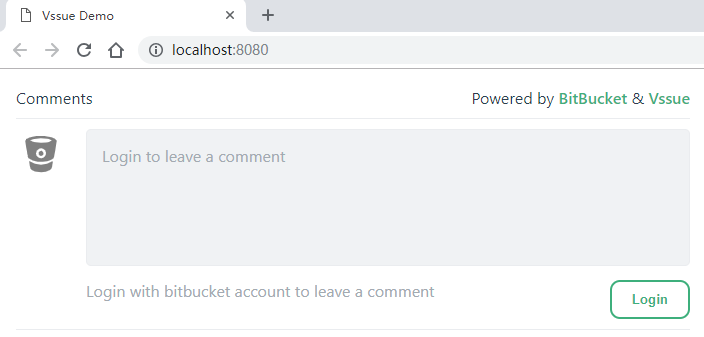
# 在本地尝试 Vssue
Vssue 已经成功运行。点击 Login 使用 Bitbucket 帐号登录。
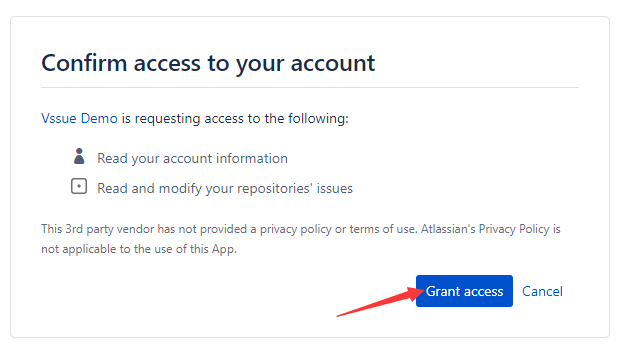
重定向到 Bitbucket 授权页面。点击 Grant access 来登录。
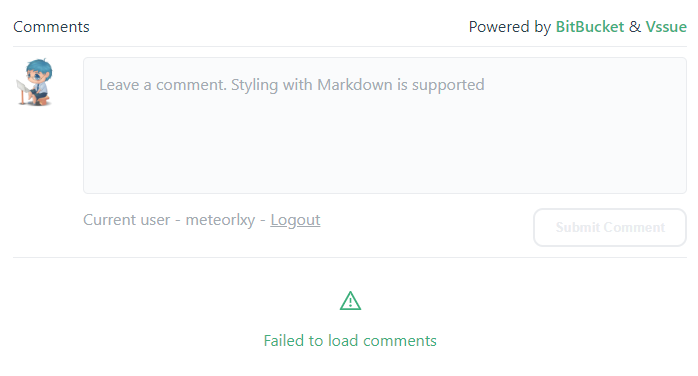
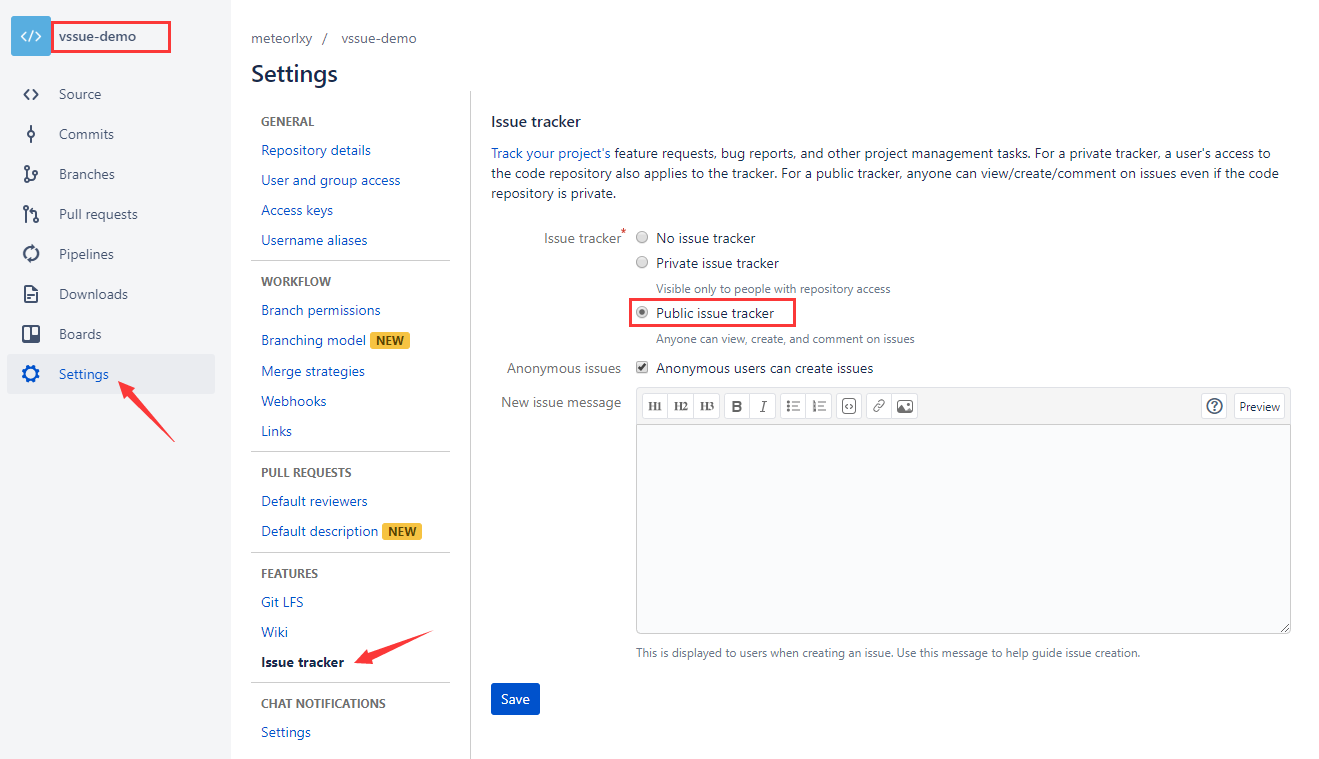
如果出现加载评论失败,你需要确认你的仓库是否开启了 Issue Tracker 功能。
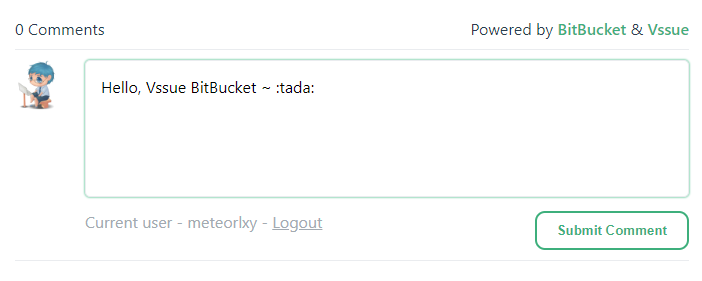
在当前页面写下评论吧 ~
提示
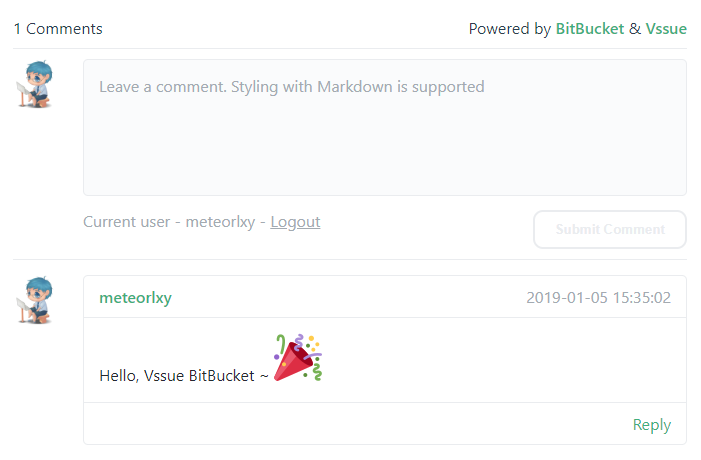
你可以前往 meteorlxy/vssue-demo 来获取 demo 代码。前往该仓库的 #1 issue 看看发生了什么。